springsecurity的学习
入门
版本需求
jdk 1.8 springboot 2.5.0 ~ 2.7.x(不能超过2.7.x)
当然这里下面的一些配置是会受到上面版本的影响, 具体的改动需要后续查找
引入依赖
1 | <dependency> |
步骤
- 首先随便写一个controller
1 | package com.learn.springsecurity.controller; |
- 然后启动服务, 发现你要访问这个地方会被拦截
认证
认证的基本流程
三个重要的过滤器
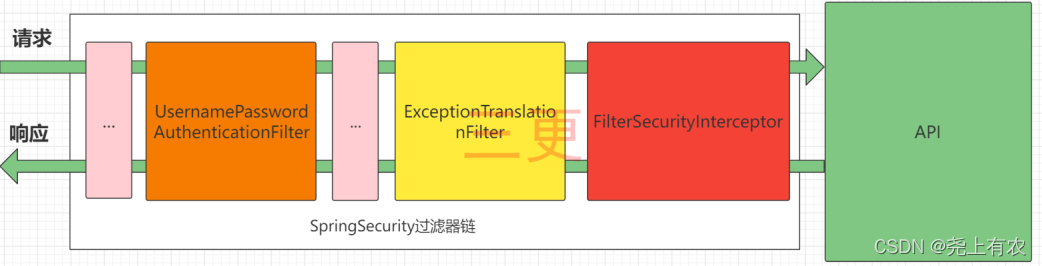
UsernamePasswordAuthenticationFilter:负责处理我们在登陆页面填写了用户名密码后的登陆请求。入门案例的认证工作主要有它负责。
ExceptionTranslationFilter: 处理过滤器链中抛出的任何AccessDeniedException和AuthenticationException 。
FilterSecurityInterceptor: 负责权限校验的过滤器。
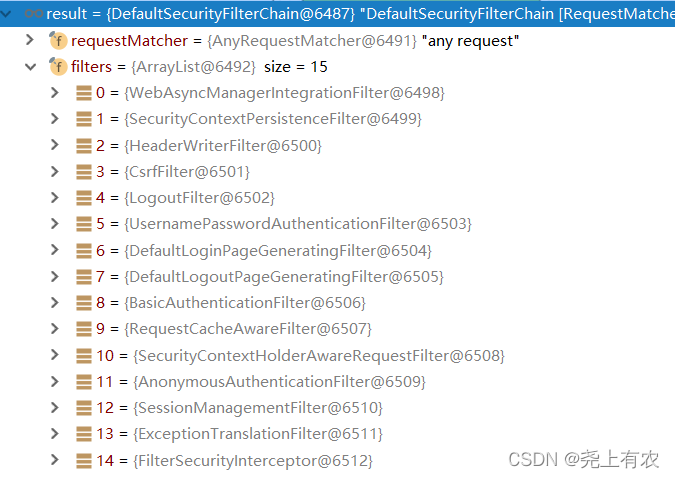
其他的过滤链条执行的顺序为如下(这里只是引入了springsecurity的依赖包之后的过滤链)
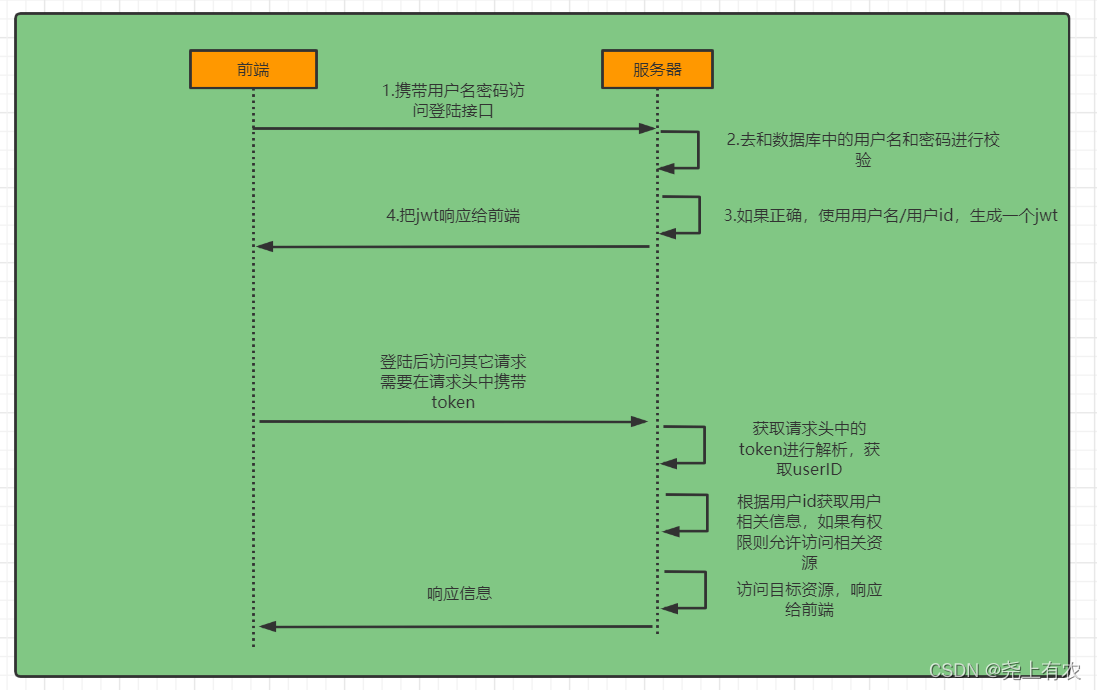
认证流程
认证图

概念
Authentication接口: 它的实现类,表示当前访问系统的用户,封装了用户相关信息。
AuthenticationManager接口:定义了认证Authentication的方法
UserDetailsService接口:加载用户特定数据的核心接口。里面定义了一个根据用户名查询用户信息的方法。
UserDetails接口:提供核心用户信息。通过UserDetailsService根据用户名获取处理的用户信息要封装成UserDetails对象返回。然后将这些信息封装到Authentication对象中。
再对 securityConfig 的时候, 我门可以这么操作, 使得 jwtAuthenticationTokenFilter UsernamePasswordAuthenticationFilter的前面
http.addFilterBefore(jwtAuthenticationTokenFilter , UsernamePasswordAuthenticationFilter.class);// 实现对密码的加密 @Bean public PasswordEncoder passwordEncoder(){ return new BCryptPasswordEncoder(); } // 对BCryptPasswordEncoder加密的小测试 @Autowired private UserMapper userMapper; @Test public void TestBCryptPasswordEncoder() { BCryptPasswordEncoder bCryptPasswordEncoder = new BCryptPasswordEncoder(); boolean matches = bCryptPasswordEncoder.matches("1234", "$2a$10$z8ZrqoQ38.N.flqHDjT7vuULL1XrKCiNX2pr0wkVa9.TpaJ3x..Py"); System.out.println(matches); }1
2
3
4
5
6
7
8
9
10
11
12
13
14
15
16
17
18
19
20
21
22
23
24
25
26
27
28
29
30
31
32
33
34
35
36
37
38
39
40
41
42
43
44
45
46
47
48
49
* 后面的发送的请求, 需要携带 token参数来访问信息。 当你携带又token的时候就会进入到这里的认证流程。
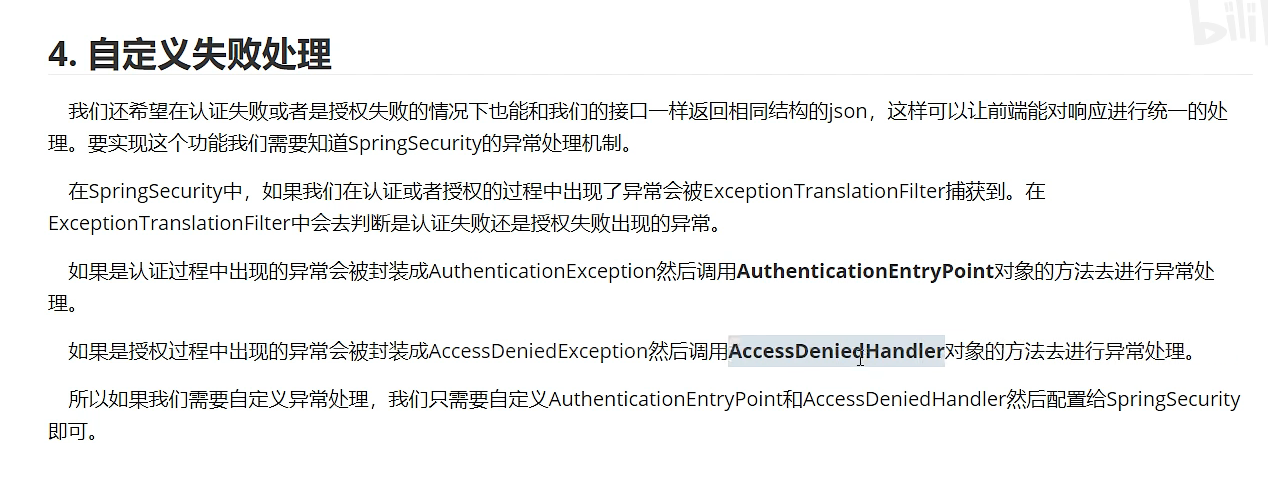
* 认证失败的处理
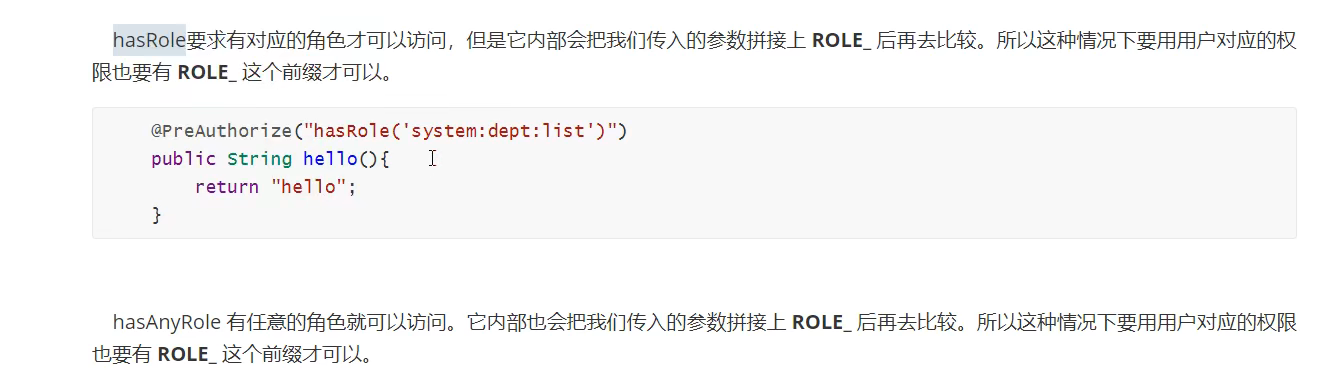
注解 hasAnyAuthority 可以传入多个字符串 (hasAuthority 只能传入一个字符串)。 还有hasRole 等等可以点击权限里面就会看到了
### 自定义权限校验方法
```java
package com.example.learn.expression;
import com.example.learn.entity.LoginUser;
import org.springframework.security.core.Authentication;
import org.springframework.security.core.context.SecurityContextHolder;
import org.springframework.stereotype.Component;
import java.util.List;
/**
* @author 吴嘉豪
* @date 2023/11/15 16:01
*/
@Component("ex")
public class SGExpressionRoot {
public boolean hasAuthority(String authority){
// 获取当前用户的权限
Authentication authentication = SecurityContextHolder.getContext().getAuthentication();
LoginUser loginUser = (LoginUser) authentication.getPrincipal();
List<String> permissions = loginUser.getPermissions();
// 判断用户权限集合中是否存在authority
return permissions.contains(authority);
}
}修改注解代码
1 |
|
基于配置的校验方式
- 我们可以再之前的配置类中 定义这个
1 | .antMatchers("/testCors").hasAuthority("system:dept:list") |
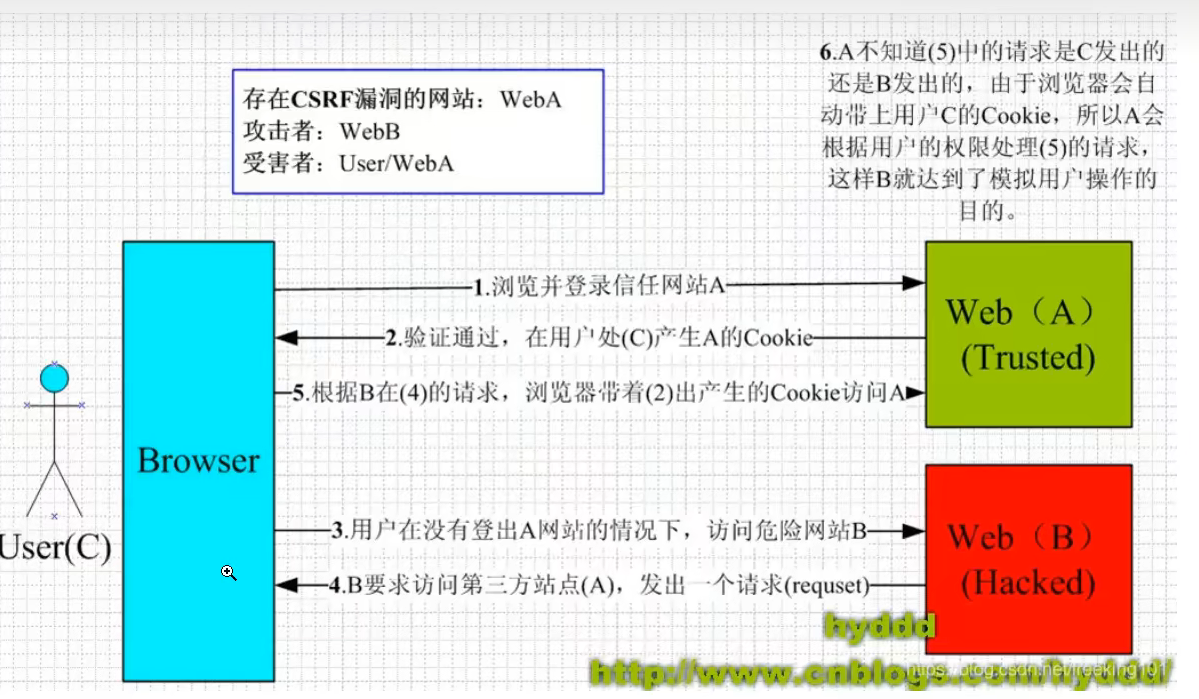
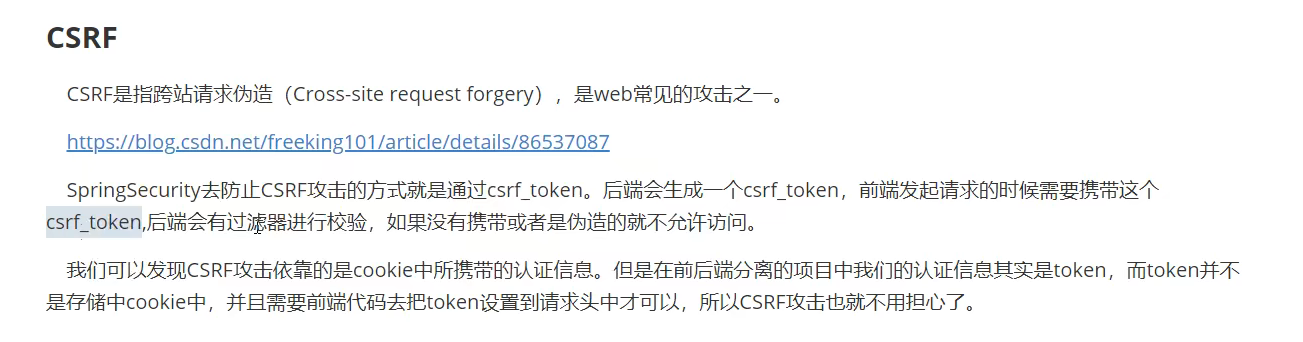
CSRF
- 什么叫做csrf 攻击
不建议的方案
登录成功处理器
登出成功处理器
补充
密码加密
参看下面博客